Tag: Powder Flow and Density

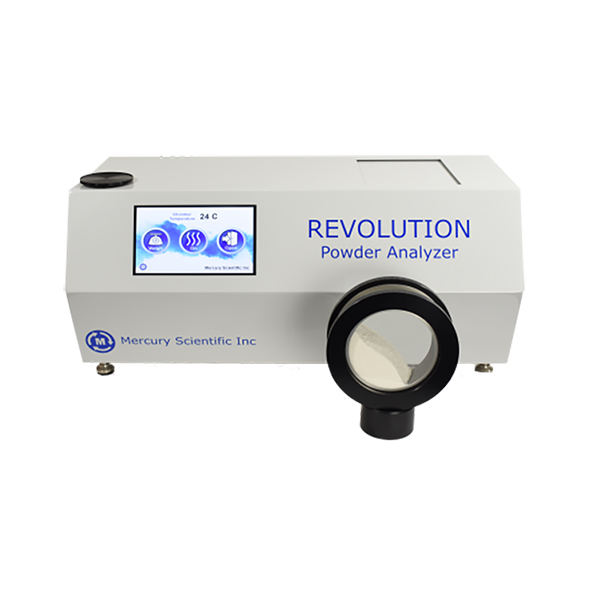
Revolution

Mercury Scientific
Revolution

Powder Flow Analyser

  • Automatic and easy to load
  • All-in-one system with temperature control
  • Ultra small footprint

Download
brochure
   Request
quote

Beckman Coulter LS 13 320 XR Laser Diffraction Particle Size Analyser 21 CFR Part 11

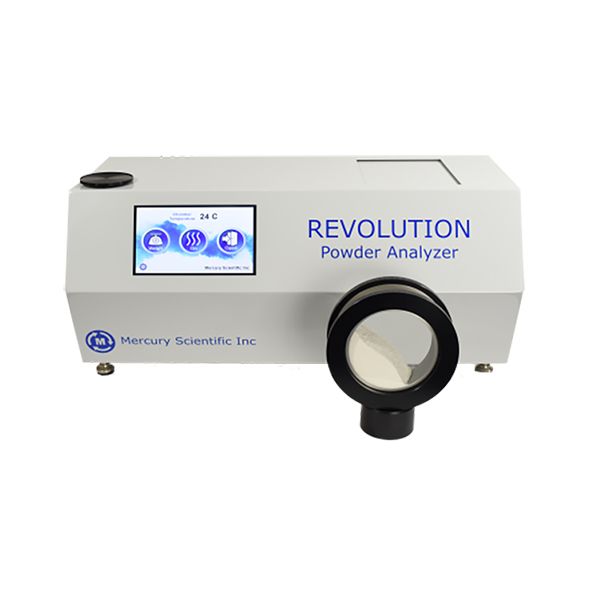
REVOLUTION Powder Analyser 

The REVOLUTION Powder Analyser can measure your powder’s ability to flow, consolidate, granulate, cake, pack and fluidise by measuring the power, time and variances in energy of your powder in a rotating drum. This data can be used to quantify your powder’s particle behaviour during process applications such as blending, tableting, mixing and transportation.

The REVOLUTION Powder Analyser is both easy to load and automatic, eliminating the opportunity for human error.

How does the instrument work?

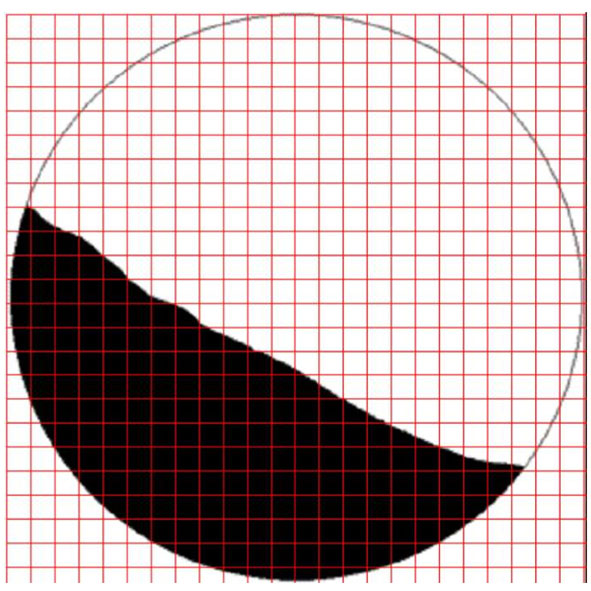
The REVOLUTION Powder Analyser consists of a rotating drum that measures the flow properties of granular and fluidised materials. Several drum sizes are available, from drums requiring 10 cc’s of sample to drums using 500 cc’s. The instrument is very easy to use. A measured volume of test powder is collected using the provided sample cup. The sample is then loaded into the sample drum and the drum is placed inside the instrument on two rollers in front of a machine vision camera. The drum is back or front lighted depending on the measurements required. The test is started and images of the sample powder are taken with the camera and are analysed using image analysis software as the drum turns or vibrates. The analysis software locates the powder and measures several powder parameters automatically for every image.

Read more

  • Flow

    Powder flowability is defined as the ease with which a powder will flow under a specified set of conditions. Some of these conditions include: the pressure on the powder, the humidity of the air around the powder and the equipment the powder is flowing through or from. For some applications, ease of flow is simply defined by whether the powder flows or not, the so called “go no-go” approach. The only question is: Will the powder flow through the system or not? For other applications, the rate and consistency of the powder flow is important.

    The following are some process examples where the flow rate and consistency is important: a powder die that must be filled with the same amount of powder each and every time or a consumer product that must flow smoothly out of a small container.

    Any device used to test powder flowability must take the application problems and processing conditions into account to supply relevant data to the user. The powder in the test device must be in the same state as it is in the process being studied. This ensures that the flow analysis will be applicable to the problem.

    The REVOLUTION Powder Analyser is the perfect powder tester for measuring the following:

    • the flowability of powders in low stress situations
    • to study how the powder behaves once it is flowing in all applications
    • to determine the condition of the powder as it moves through a process.

    A flowability method is created by selecting the time and rate of rotation based on evaluated process conditions. 10-500cc’s of sample are placed inside of the measurement drum. The instrument is run for a set number of avalanches or data points.

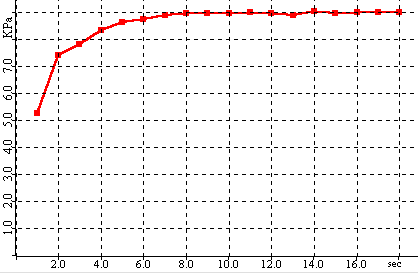
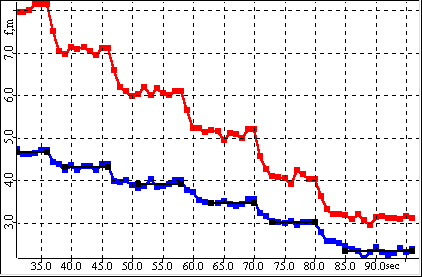
    The instrument measures 20 parameters relating to the behavior of the sample in the drum including avalanche energy, break energy, surface fractal, sample density, avalanche angle, etc. The standard deviations for all of these measurements is also calculated. Figure A presents the energy level of the powder in the sample drum over time.
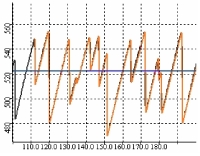
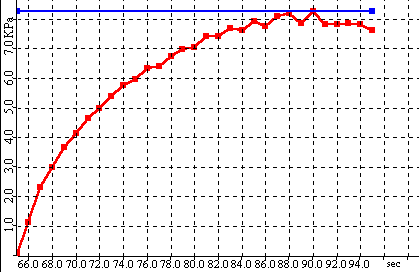
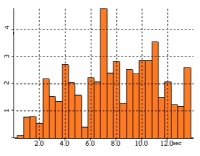
    The REVOLUTION Powder Analyser calculates the power average by measuring the change in the power of the powder for each avalanche. The avalanche spectrum shows graphically the total power amplitude at each avalanche frequency in Figure B.
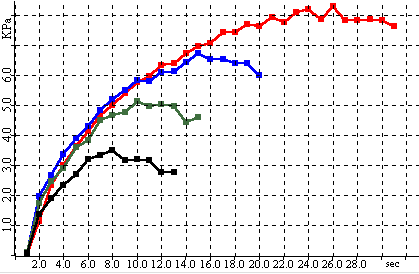
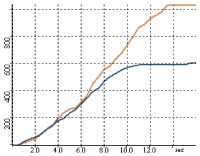
    The cumulative powder spectra provides an excellent tool for comparing the flow properties of different powders (Figure C). The lower the avalanche time and energy, the better the powder flows.
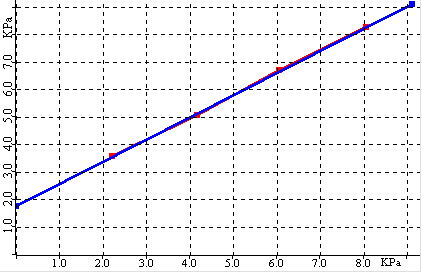
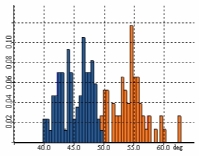
    The REVOLUTION Powder Analyzer also measures avalanche angle and rest angle of each avalanche. This Angle Graph displayed in Figure D indicates the angles required to start and continue the flow of the powder. The rest angle is typically very close to the angle of repose of the material. The advantage of the RPA is that these measurements can be made hundreds of times providing a repeatable average as well as a range for each parameter measured.
    The REVOLUTION Powder Analyser measures many parameters to help determine the difference between powders and establish parameters for predicting powder performance. These measurements include fractal dimension, powder volume and surface linearity. Once the flowability test has been completed, the software will provide the user with the statistical analysis.

  • Fluidisation

    A powder is fluidised when a gas is injected into the powder causing the powder particles to separate and enter a fluid like state. The properties of the powder, as well as the pressure and temperature of the gas, determines the degree of fluidisation. For fine powders, the gas pressure required to fluidise the particles is very low. This low pressure can be created by rotating the powder in a drum. Varying the rate of drum rotation results in changes of the fluidisation pressure. The fluidisation of a fine powder can be studied by measuring the volumetric expansion of the powder in a rotating drum as a function of the rotation rate of the drum.

    The following are some process examples where the flow rate and consistency is important: a powder die that must be filled with the same amount of powder each and every time or a consumer product that must flow smoothly out of a small container.

    In addition, the rate at which a fluidised fine powder settles to its original state can be measured by stopping the rotation and reducing the fluidisation pressure to zero.

    The REVOLUTION Fluidisation Test measures a powder’s volume increase at specified angular velocity intervals in a rotating drum to create a fluidisation function for the powder. During the fluidisation test, the rate of decrease in the powder’s volume is measured to create a settling function for the material. Appropriate powders for the REVOLUTION Fluidisation test include: toners, catalysts, powder coatings, and other powders with low pressure fluidisation potential.

    There are four optional process steps to the Fluidisation Analysis: Prep, Settling, Analysis, and Settling. These four steps are discussed below.

    • Prep Step

      Within the Prep Step, the user can rotate the powder at a chosen rotation rate and length of time to completely fluidise the material. This step will allow the user establish a repeatable initial fluidised state for this analysis. This prep step can be skipped if the user wishes to study the fluidisation of the material in its original state.

    • Settling Step

      If the material has been fluidised in the prep step, the material must return to its un-fluidised state to perform the fluidisation analysis. In this step, the rotation of the drum is stopped for a specific length of time or until the volume of the sample reaches its original state. The rate at which the powder’s volume decreases is measured and is used to create a settling function.

    • Fluidisation Analysis Step

      During the analysis, the user sets the start and end drum rotation rate with the desired step rate. REVOLUTION will begin the drum rotation at the specified start rotation rate, stepping up the rate at the desired intervals until the end rotation rate is achieved. The user can chose to ramp up the angular speed at any desired intervals to achieve the equilibrium fluidised state.

    After a specified equilibration time has elapsed at the end rotation rate, REVOLUTION will begin computing the statistical measurements described below for this fluidisation analysis step. In Figure A, the statistical analysis shows the operator the rate at which the powder fluidised by the increase in the overall volume. In Figure B, the fluidisation test results are shown for two different powder samples: one sample fluidises at a faster rate than the other.
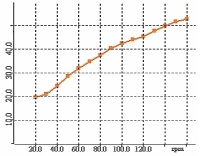
    Figure A – Fluidisation function sampkle height v.s rotation speed
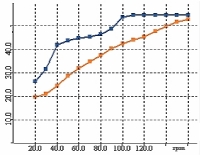
    Figure B – Overlay of Fluidization Function for 2 samples

    After the fluidised analysis, the REVOLUTION Powder Analyser measures the settling time of the powder. This settling time is valuable for anyone who is fluidising a coating for example and needs to know the amount of time required for the powder to settle on the coating surface. In Figure C, the analysis shows the operator the rate at which the powder settled after the fluidisation operation had been stopped.
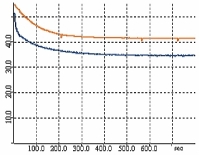
    Figure C – Overlay of settling rate for two samples

  • Multi-Flow

    Powders can behave very differently depending on the amount of energy they are subjected to as they move through handling equipment. One powder may flow more evenly as it is subjected to more mechanical energy while another powder may become more erratic. This behavior can be studied using the REVOLUTION Multi-Flow test method. In the multi-flow method, the sample drum speed is increased gradually over time and the sample powder’s behavior is measured.

    The Multi-Flow Analysis studies how a powder or granular material transitions from avalanching to continually flowing as it is subjected to faster speeds. By gradually increasing the rotation speed in the Multi-Flow Analysis, the user can evaluate the speed at which their powder is no longer avalanching in their process but flowing continuously. This data can be used to predict how powders will behave in high speed equipment.

    Before analysis, the samples are prepared by rotating the sample drum at a fixed speed for a fixed time. In this case, the preparation consisted of rotating the powder drum at 20 RPM for 30 seconds to aerate the sample. The prep time and rotation speed are user programmable and are selected to best suit the application being studied.

    After preparation, the sample drum rotation is started and sample properties are measured. After programmable intervals, the drum speed is increased by fixed intervals and changes in the sample properties are determined.

    The Energy Function Graph displays the energy level of the sample powder versus drum rotation rate. This data is used to calculate energy slopes. The gray area presents the standard deviation of the energy level. Figure A shows data for a sample that behaves more erratically as the rotation speed increases while Figure B shows data for a sample that’s behavior improves.
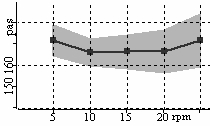
    Figure A – Energy Function

    Poor Sample Behavior
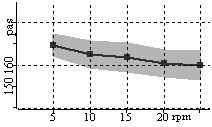
    Figure B – Energy Function

    Good Sample Behavior

  • Packing

    The Packing Analysis studies the powder’s ability to pack or settle after being exposed vibrational energy during transportation and storage.

    The following are some process examples where packing and settling are important: a container that must be filled with the same amount of powder each and every time but settles to a different amount during transportation and storage or a powder that packs into a strong cake during handling and storage. An ideal powder has properties that do not change during processing, handling and storage.

    Any device used to test the changes in volumetric expansion and compression must take the application problems and processing conditions into account to supply relevant data to the user. The powder in the test device must be in the same state as it is in the process being studied. This ensures that the packing analysis will be applicable to the problem.

    The REVOLUTION Packing Test has three process steps: Preparation, Vibration and Analysis.

    Sample Preparation

    The sample powder is rotated at a chosen rotation rate and length of time to completely aerate the material. This step will allow the user establish a repeatable initial powder state before beginning the packing analysis. After the initial preparation, the RPA measures the powder volume.

    Vibration

    The motor in the REVOLUTION Powder Analyzer vibrates the powder for a period of time at a specified amplitude and frequency. The sample volume is monitored during the vibration and the final volume is recorded as the volume after vibration. The percentage change in volume from after prep and after vibration indicates the sample’s ability to pack during storage and transportation.
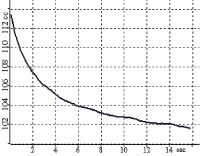
    Volume during vibration

    Analysis

    After the volume measurement, the powder is rotated at a specified speed until the compacted powder breaks (or avalanches). The software calculates the force required to break the powder mass.
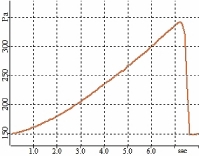
    Figure A – Energy Function

    Poor Sample Behavior
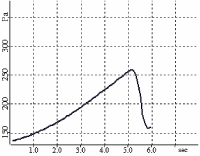
    Figure B – Energy Function

    Good Sample Behavior

  • Static

    Electrical Charge and Material Handling

    Powders and granular materials can acquire electrical charge on the surface of their particles due to contact and movement against handling equipment and containers. They can also acquire charge due to contact and movement of particles within the material itself. This process is called tribocharging. Tribocharging is caused by electrons moving from one surface to another when different materials come in contact with each other. One material will become positive and the other will become negative. The amount of charge developed depends on the nature of the materials in contact, the pressure of the contact, the relative velocity of the contact surfaces, and the friction between the contact surfaces.

    Measuring the charge acquisition properties of powders and granular materials is important because charge acquisition leads to problems and unstable behavior. Charged materials stick to processing equipment and containers. Charged materials can become airborne more easily. Charge materials flow in different ways than materials with no charge. In fact, many research believe that material electrical properties are the most important contributors to powder flow behavior.
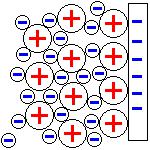
    Charge can cause powder particles to stick to one another and to equipment surfaces creating blockages and cleaning problems
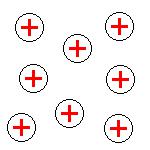
    Charge can cause particles to repel one another creating airborne dust and materials that are difficult to control
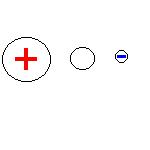
    Flow agents and glidants can dissipate charge in a powder or prevent charge from accumulating
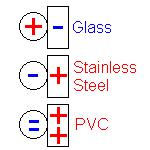
    Contact materials can create or remove charge from powders and granular materials.

    Using the ION Charge Module with the Revolution allows measurement of charge acquisition properties between contact surfaces and test samples while controlling velocity and contact time.

    Step 1:

    Test sample is loaded into the sample drum and placed in the analyzer on the two rollers.
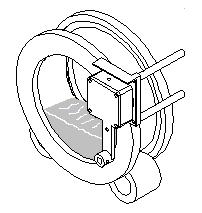
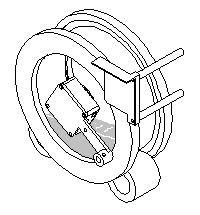
    Step 2:

    The field meter is rotated in front of the sample drum and the initial charge on the surface of the contact plate is measured.
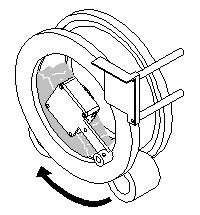
    Step 3:

    The sample drum is rotated at a programmed velocity and the charge on the contact plate is measured at programmable intervals.
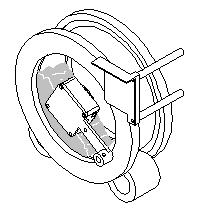
    Step 4:

    The drum rotation is stopped and the field meter measures the charge dissipation.
    Experimental Data

    Charge Versus Particle Size
    SAMPLE
    CHARGE
    D50 = 4um

    3708 V

    D50 = 8.2um

    3009 V

    D50 = 11-15um

    2303 V

    D50 = 16um

    1516 V

    The data above is for a powder with different particle sizes charged with glass. Typically charge development increases as particle size decreases.

    Charge Versus Moisture Content
    SAMPLE
    CHARGE
    0.7% Moisture

    2006 V

    0.9% Moisture

    1098 V

    1.2% Moisture

    731 V

    2.9% Moisture

    43 V

    The data above is for a powder with different moisture content charged with glass. Typically charge development decreases as moisture content increases.

    Charge Versus Flow Aid Concentration
    SAMPLE
    CHARGE
    No flow aid

    -1260 V

    0.4% Flow aid

    240 V

    0.8% Flow aid

    1310 V

    The data above is for a powder with different flow aid concentrations charged with polycarbonate. Typically charge development changes as flow aid content changes.

    Charge Versus Surface Treatment
    SAMPLE
    CHARGE
    No surface treatment

    -1367 V

    0.05% Surface treatment

    1257 V

    0.15% Surface treatment

    2007 V

    The data above is for a powder with different concentrations of surface treatment liquid charged with glass.

  • Temperature

    The Revolution Temperature Control option can heat samples from room temperature up to 250 degrees Celsius while running flow tests. Samples can be heated moving constantly, moving intermittently or not moving. Tests can be performed before heating and at temperature intervals.

    Example Test Data
    Sample 26C 110C 135C
    Polymer Avalanche Angle 51.8 deg Avalanche Angle 60.1 deg Avalanche Angle 68.2 deg
      Density 0.436 g/cm3 Density 0.379 g/cm3 Density 0.372 g/cm3
    Polymer Annealed Avalanche Angle 50.5 deg Avalanche Angle 58.0 deg Avalanche Angle 63.3 deg
      Density 0.438 g/cm3 Density 0.390 g/cm3 Density 0.383 g/cm3

    A polymer was tested at 26C, 110C, and 135C to determine flow changes with temperature between annealed and non-annealed. Increases in temperature caused the powders to flow more poorly and this resulted in a lower powder bed density. In this case the annealed material showed more flow temperature resistance than the non-annealed material.

  • Options

    Each REVOLUTION Powder Analyzer includes:

    • One 100mm Large Sample Drum Assembly
    • One 100cc Sample Cup
    • One Set of Cables
    • One Revolution Powder Analyser Software Package
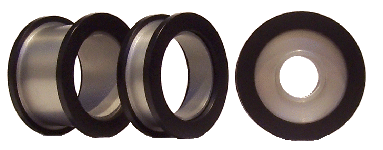
    The Following Additional Options are available:

    • Ion Static Charge Analysis Module to measure the tribo-charging properties of powders, including charge sensor assembly, polycarbonate drum sides, and de-ionizing blower
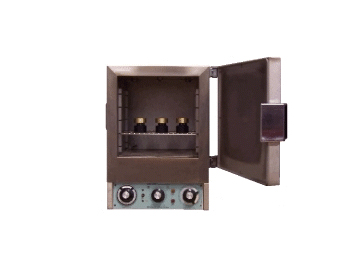
    • Temperature Control Oven to heat samples to 250 degrees Celsius
    • 50mm Small Sample Drum Insert with small sample cup for measuring 25 cm3 of sample.
    • An additional 100mm Large Sample Drum Assembly with large sample cup.
    • 100m Extra Large Sample Drum Assembly for testing granular material, sample volume 500ccs.
    • Packing Analysis with Drum Locking Assembly for high vibrational energy packing test.
    • Set of Drum Seals for either small, large or extra large sample drums for making sample drums air and water tight.
    • IQ/OQ Certification Package which includes: IQ/OQ Procedure, IQ/OQ Certification Document and Drum Test Standard.
  • Applications

    Additive Manufacturing

    AM Segmentation and Humidity

    Caking and Agglomeration

    Granular Material

    ASTM Committee

    Additive Manufacturing

    Static Charge

    Caking

  • Specifications

    Instrument size

    60 cm x 23 cm x 23 cm

    Contact materials

    Glass and aluminium

    Sample size

    20 to 500ccs

    Drum rotation rate

    0.1 to 200 RPM

    Computer connection

    USB3, Ethernet

    Operating system

    Windows 7, Windows 10, Windows 11

    Power requirements

    80-230 Volts, 3 amps
Not sure if it’s the right instrument?

No worries, send us a sample and we will test it for you


Send a sample

Continue reading

Evolution

Mercury Scientific
Evolution

Powder Flow Tester

  • Easy to understand powder flow analysis
  • Simple analysis procedure
  • 3 minute test time
  • Very affordablw

Download
brochure
   Request
quote

Beckman Coulter LS 13 320 XR Laser Diffraction Particle Size Analyser 21 CFR Part 11

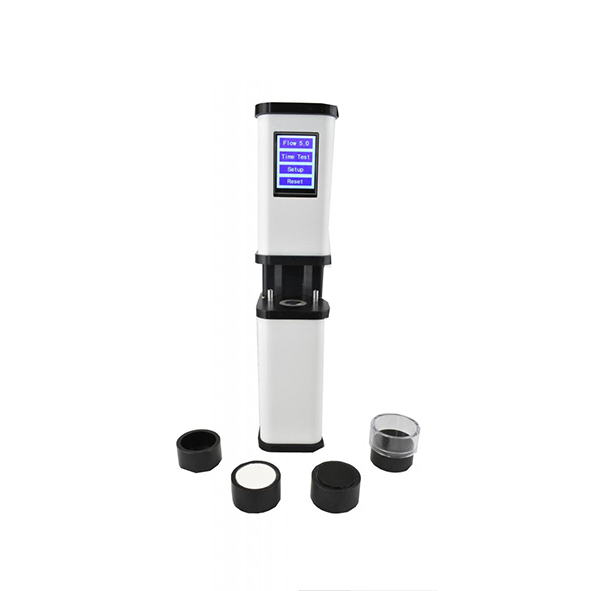
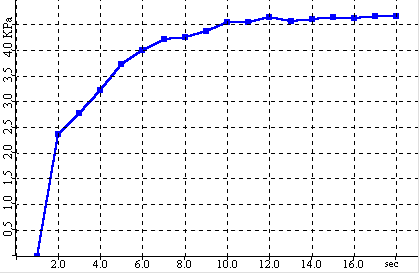
The patented EVOLUTION Powder Tester measures a powder or granular material’s response to environmental stresses. The major stress on a material is pressure. The EPT measures a material’s response to pressure by applying pressure to the material and then measuring its resulting strength. This strength is known as the unconfined yield strength. If a powder is to flow, the force making the powder move must be greater than the unconfined yield strength.

The unconfined yield strength can be measured at one pressure or at many pressures to create what is called a flow function. The flow function presents the material’s gain in strength as more pressure is applied to it.

For most powders and granular materials, the longer the material is exposed to pressure, the higher the unconfined yield strength becomes. Therefore, for powders and granular material that are stored for any length of time, it is essential to study the effects of pressure over time. This is called time unconfined yield strength. In addition, a time flow function can be created. With the EPT, time tests are easy and inexpensive to perform. Time cells consist of sample cells and weights that allow a material to be subjected to various pressures over long periods of time. In addition to pressure, temperature and humidity can affect a material’s strength over time. The EPT time cells are designed so that they can be easily placed in ovens and humidity chambers to study their effects on materials in storage situations. Time is the unmeasured parameter in flow property tests. The reason? Analysis cells for many flow measurement cells are very expensive and do not include the means of applying pressure over long periods.

The EVOLUTION Powder Tester measures the unconfined yield strength and time unconfined yield strength for less than the cost of having 3 or 4 samples tested by independent laboratories.

  • Unconfined Yield Strength

    The unconfined yield strength of a material is the force or stress required to deform or break a material when it is not confined by a container (free unstressed surface). From a testing perspective, the unconfined yield strength can be expressed as the stress required to fail or fracture a consolidated mass of material to initialize flow. The force used to consolidate the mass of material is called the Major Consolidation Stress.

    The unconfined yield strength is very important in studying the flowability of materials. The reason is that the force required to get a powder or granular material to flow is directly related to the unconfined yield strength. In simple terms, the powder or granular material will flow if the force acting on it is greater than the unconfined yield strength of the material. A flow factor (ff) is calculated by dividing the major consolidation stress by the unconfined yield strength. This flow factor is used to classify materials into categories such as non-flowing (ff < 1), very cohesive (1 < ff < 2), cohesive ( 2 < ff < 4), easy flowing (4 < ff < 10), and free flowing (ff > 10).

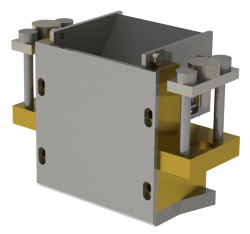
    The EVOLUTION Powder Tester measures the unconfined yield strength of a material in a two stage process. First, the material is loaded into a sample cell and compressed by vertical pressure.

    The EVOLUTION Powder Tester measures the unconfined yield strength of a material by applying pressure to a sample over time. First, the material is loaded into a sample cell.

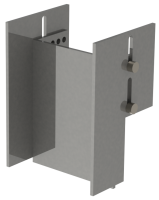
    Then, a predefined pressure is applied to the top of the sample to consolidate it. The pressure can be applied on the instrument or by using weights.
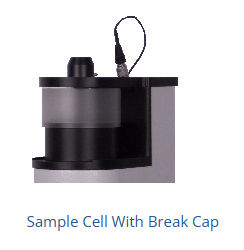
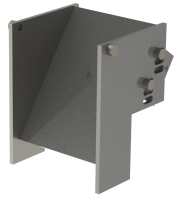
    After the material is compressed, the sample is then automatically removed from the sample cell and force is applied to the top of the sample to break or fail the material. The break cap contains the material for easy clean-up. The maximum force recorded when breaking the material is the unconfined yield strength.

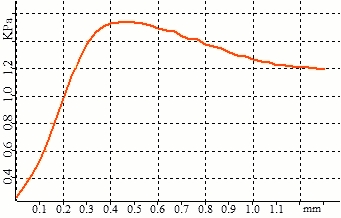
    Break Stress Versus Break Strain

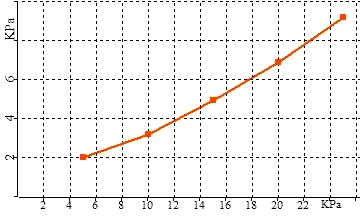
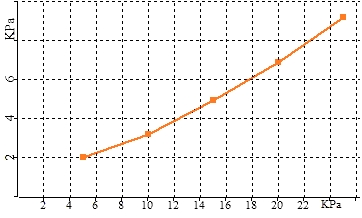
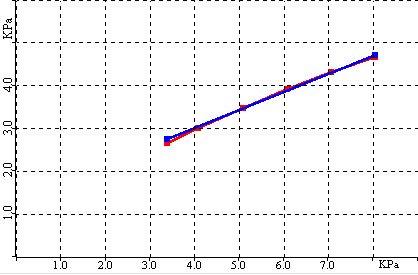
    The unconfined yield strength of a material typically increases as the pressure on the material increases. A plot of the unconfined yield strength versus the major consolidation stress is called a flow function. The flow function presents the powder or granular material’s response to pressure. Flow functions are very useful for predicting flowability because the forces acting on a material change at various points in a typical process. Therefore, it is important to know how the material responds to these forces.

    Flow Function

    Flow functions are also very useful for comparing the flow behavior of formulations and blends. As can be seen below, at low pressure the two samples are similar but at higher pressures their behavior diverges dramatically.

    Flow Function Overlay

    In addition, the unconfined yield strength of a powder or granular material typically increases the longer it is under the major consolidation stress. For this reason, it is very important to measure the time unconfined yield strength for materials that will be stored for any length of time. A plot of the time unconfined yield strength versus the major consolidation stress is typically called the time flow function.

  • Time UYS

    The unconfined yield strength of a powder or granular material typically increases the longer it is under the major consolidation stress. For this reason, it is very important to measure the time unconfined yield strength for materials that will be stored for any length of time.

    The EVOLUTION Powder Tester measures the time unconfined yield strength of a material by applying pressure to a sample over time. First, the material is loaded into a sample cell.

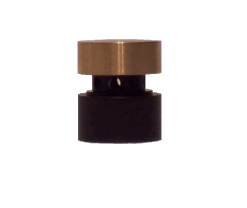
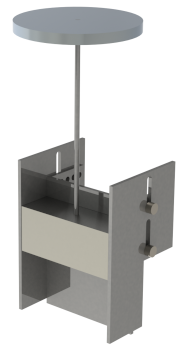
    Then, the sample is compressed by vertical pressure applied from a weight or weights. Each weight delivers 2.5 KPa.

    The material is then left for hours or days under controlled conditions to allow the major consolidation stress to act on the material for a specific period of time. These controlled conditions include temperature and humidity. The sample cells are small enough and stable enough to be put in ovens and humidity chambers or simply on laboratory shelves.

    After the material is compressed, the sample is then automatically removed from the sample cell and force is applied to the top of the sample to break or fail the material. The maximum force recorded when breaking the material is the unconfined yield strength.

    A plot of the time unconfined yield strength versus the major consolidation stress is typically called the time flow function. The time flow function is measured by applying a different number of weights to different sample cells. Each Evolution cell weight corresponds to 5 KPa.

    Typically powders and granular materials gain strength as they are exposed to major consolidation stress over time.

  • Quality Control

    Powder flow testers can be difficult to use in quality control or plant settings. The reason is that many testers are difficult to load, time consuming to use, not very precise, and expensive. Not the EVOLUTION Powder Tester. The EPT was designed from the start to be fast, easy to use, precise and inexpensive. In addition, due to its simple design, the EPT requires no routine maintenance. In short, the perfect quality control instrument for measuring flow behavior.

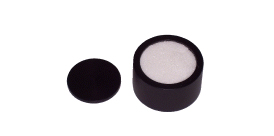
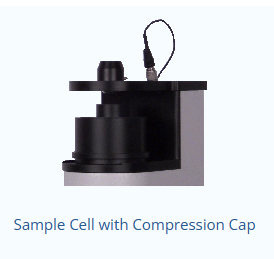
    For QC measurements, the EVOLUTION Powder Tester can measure the unconfined yield strength of a sample at one pressure in 3 minutes. Loading the sample into the analysis cell is easy as it is a simple cup. A filling tool is used to overfill the cup and then scrape the top to get the correct amount of sample in the cup. The sample cup it then put on the EPT with the compression top to compress the sample. After compression, the compression top is replaced by the break cap and the unconfined yield strength is measured.

    Measuring the unconfined yield strength of a material can provide information as to whether a material is on specification and will handle as expected. Because the test is fast, all shipments or production lots of material can be tested before they are transferred to processes and can create problems.

  • Analysis Cells

    There are two options for EVOLUTION Powder Tester analysis cells along with time test options for each.

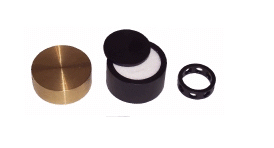
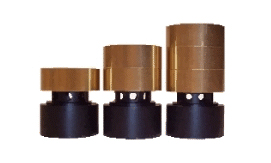
    • Small UYS Cell – The patented Small UYS Cell is a test cell for measuring the unconfined yield strength of cohesive or compressible powder samples. The test volume is 5 cm3.
    • Standard UYS Cell – The patent pending Large UYS Cell is a test cell for measuring the unconfined yield strength of cohesive granular materials. The test volume is 25 cm3

    Time Options

    The above cells are sold in sets of five with five weights to allow time tests to be measured.

  • Vs Shear

    The Evolution Powder Tester is used to compare the behavior of materials under consolidated load. The only other instruments available for this type of test are powder shear testers. The Evolution was designed specifically as an alternative to shear testers for the following reasons:

    1) Shear testers are slow – A typical unconfined yield strength shear test takes 45 minutes. A flow function takes hours. Aside from waiting for data, the slow test time gives the sample material time to changed due to environmental conditions i.e. moisture loss or temperature change. The Evolution requires 3 minutes for an unconfined yield strength test and 15 minutes for a 5 point flow function.

    2) Shear testers subject the sample to mechanical stress that causes sample breakdown – The original shear testers used fresh material for every point on the yield locus to ensure that the repeated testing did not change the material. Some instruments use the same material over and over because they are impractical if fresh sample is used each time. This can cause inaccurate strength data due to attrition and prefered particle orientation in the shear zone. This may occur to different degrees in different samples. In addition, a sample should never be exposed to more than one stress level i.e. run a flow function on the same sample. In our experience this causes the flow function to be inaccurate in roughly 80 percent of tested samples. The Evolution uses fresh sample for every test.

    3) Shear testers cannot control the stress level on the sample – To compare the unconfined yield strength of samples, it is essential to subject them to exactly the same conditions. This does not happen in shear testers. The major consolidation stress is controlled by the normal load and the shear forces in the sample. The normal load is controlled but the shear stress depends on the sample. This means that flow indexes calculated by shear testers are not performed at the same stress level. This can actually create artificial differences in the measurements between samples. In addition, if one sample tests faster than another, it is exposed to much less mechanical stress. With the Evolution, the stress on the sample is completely controlled and is the same for every sample tested.

    4) Time tests are expensive and difficult if impossible with shear testers – Shear test cells are complex which makes them expensive. In addition, they usually have a large lid area which means large forces are needed to keep the sample under pressure for any length of time. These two factors typically preclude time measurements. Some manufacturers claim to run time test by leaving the sample in the instrument for long periods of time. However, this is not practical for two reasons: 1) the instrument cannot be used for other tests during this period; and 2) the sample is not under controlled conditions (unless the whole instrument is put in a glove box – but then temperature and humidity conditions are severely limited). The Evolution was designed for time tests with inexpensive test cells, small lid areas requiring lower forces, and standard weights included. Test time after removal from ovens or humidity chambers is 20 seconds giving the sample no time to change.

    The only claim shear tester manufacturers can make against the Evolution is that they are following a standard test for powder strength measurements. However, this is not really true. There are no universally accepted methods or shear cell designs for measuring the true strength of materials. The only real claim shear tester manufacturers can make is that their instruments get the correct strength for the only recognized powder flow standard. This flow standard is BCR limestone. This limestone was a sample that was tested in a round robin method at several European powder flow laboratories using the linear shear cell. The average results of all of the laboratories has become the “standard” value. Therefore, the thinking goes, if an instrument measures the correct value for the limestone then it is accurate for every other sample. The good news is that the Evolution measures the correct values for the limestone standard under all test conditions. We are happy to provide potential customers with a complete report with this data. More good news is that it makes these measurements faster, easier, and less expensively than shear testers.

  • Applications

    Caking and Agglomeration

    Unconfined Yield Strength

    Granular Material

    Evolution v’s Shear Testers

    Evolution v’s Yield Strength Test

    Caking

Not sure if it’s the right instrument?

No worries, send us a sample and we will test it for you


Send a sample

Continue reading

Volution

Mercury Scientific
Volution

Volution Powder Flow Tester

  • Affordable
  • Tests pressures up to 250 kPa
  • Automatically weighs sample for density and compressibility

Download
brochure
   Request
quote

Beckman Coulter LS 13 320 XR Laser Diffraction Particle Size Analyser 21 CFR Part 11

Volution Powder Flow Tester

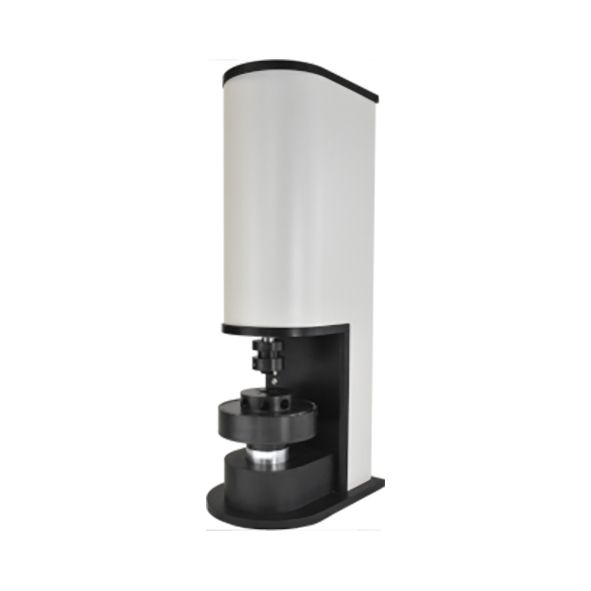
The Volution Powder Flow Tester (VFT) measures the flow properties and bulk characteristics of powders and bulk solids. The system uses an annular shear cell to measure a powder’s response to consolidating pressure using the yield locus technique. This allows the system to measure the cohesion and angle of internal friction of the material as well as its unconfined yield strength. The system also measures wall friction and compressibilty. Flow functions can be measured by testing the materials at different pressures.

  • Flow Theory

    Power flowability can be measured using the Volution Powder Flow Tester.

    Powder flowability is defined as the ease with which a powder will flow for a specified set of conditions. Powder is generally defined as a collection of individual solid particles surrounded by gas phases. This includes granular materials, bulk solids, pelletised materials, etc. An accepted method for quantifying powder flowability is the Mohr-Coulomb Model. The Mohr-Coulomb Model is a limit state or “Go/ No Go” model and can be used to accurately predict flow behavior. This model quantifies powder flowability with two measurable parameters, Cohesion and Angle of Internal Friction, and two derived parameters, Unconfined Yield Strength and Major Consolidation Stress.

    Cohesion is a measure of particle to particle bonding strength. This bonding strength results from various inter-particle forces generated by electrical charges, van der Waals forces, moisture, etc. The Angle of Internal Friction is a measure of the force required to cause particles to move or slide on each other. Internal friction is influenced by many parameters including particle surface friction, particle shape, hardness, particle size, etc. distribution, etc. Cohesion and Angle of Internal friction are determined by measuring a powder’s yield locus. The Yield Locus is a graph of the shear force require to cause a powder to yield or fail relative to compressive load. Cohesion is the intercept of the yield locus and the angle of internal friction is the slope.

    Yield Locus
    Shear Stress versus Normal Stress

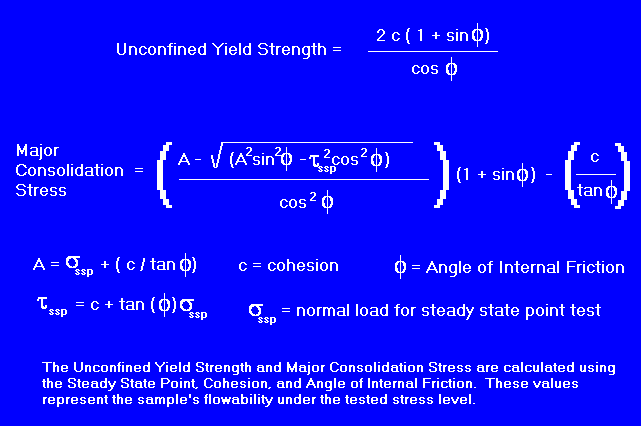
    The Unconfined Yield Strength is the shear stress needed to fail or fracture a consolidated powder mass to initialize flow. The force used to consolidate the powder mass is called the Major Consolidation Stress. In other words, the unconfined yield strength is a measure of the strength of a powder mass when the powder experiences major consolidation stress. The Unconfined Yield Strength is calculated using the below formula:

    A Flow Function Plot can be generated by plotting a powder’s Unconfined Yield Strength versus Major Consolidation Stress. The flow function plot is a quantitative measure of the flowability of the powder. The inverse of the slope of the flow function plot can be used as a flow index. Generally, the closer a powder’s flow function is to the x-axis, the more easily the powder will flow. The Volution is used to measure a powder’s cohesion and angle of internal friction at various loads to generate its flow function and thus quantify its flow behavior.

  • Yield Locus Analysis

    The yield locus analysis is designed to determine the angle of internal friction and cohesion for a sample material and then calculate its overall strength under compressive load.This is achieved by measuring the failure strength of a sample under various loads after consolidation under a preset pre-shear load. Plotting the failure strength of the material under different loads generates a yield locus for the sample under the pre-shear load.

    The test consists of three parts for every point on the yield locus: consolidation, steady state and failure analysis. Depending on the type of cell used, failure points can be generated on the same sample or fresh sample can be used for each failure point. Generally 3 to 5 points are used to generate the yield locus due to the time required for each point as well as the wear on the sample. If time consolidation is used, a delay time occurs after the steady state step.

    In the consolidation step, the sample in the measurement cell is compressed to the preset normal load.With linear cells, this step includes twisting of the lid to help pack the material in the cell to what is called its “critical consolidation”.Critical consolidation is defined as the sample density at which it will reach a steady shear with minimal shear travel.This state in indicated by constant sample density or by a leveling off of the drop in normal load after each twist of the cell lid.For rotational cells, the consolidation step simply consists of compressing the sample until the normal load is reached.

    Sample Consolidation

    Normal Load versus Time

    In the steady state step, shear stress is applied to the sample until the measured shear force and sample volume become stable. With linear cells, the shear stress is applied by moving pushing the lower ring of the cell at a fixed rate relative to the upper ring.For rotational cells, the lid is rotated a fixed rate. The steady state point is the point at which the shear force becomes stable.At the steady state point, the sample has reached a repeatable, stable density relative to the applied compressive load.

    Steady State

    Shear Force versus Time

    In the analysis step, the shear stress is reduced to zero by reversing the shear stress mechanism.The normal load is then reduced to a predetermined level called the shear load and the shear stress is again applied.The shear forces rises as the sample resists shearing until a maximum shear force is reached.At this point the sample fails and the shear force drops rapidly.The generate yield point consists of the maximum shear force and the shear load.
    Static Failure Analysis

    Shear Force versus Time

    By repeating the above sequence 3 to 5 times, a series of yield points are generated from which a yield locus can be plotted.The yield points are selected so that they are in the linear portion of the yield locus.

    Static Failure Points

    Shear Force versus Time

    A least squares regression is performed to calculate a linear function for the yield locus.The slope of the calculated line is the angle of internal friction.The intercept of the line is the cohesion.From the cohesion, angle of internal friction and steady state point, the unconfined yield strength and major consolidation stress are calculated using Mohr Coulomb equations.

    Static Yield Locus

    Shear Force versus Normal Load

    Because the yield points are generated by measuring several steady states for the same sample, the steady state point used for the strength calculation is the average of all the steady state points.In addition, to account for the effect of the steady state on the measured shear force during failure analysis, the measured shear force can be adjusted based on whether its steady state was higher or lower than the average.This is called prorating and can correct for variations in sample density for each yield point measurement.

    Compressibility is calculated using the sample’s initial density and density after the consolidation step.

    Static yield analysis generates the strength of a static or not-moving sample.This would be the condition in a silo or chute when the sample is at rest.Therefore, to get the sample to flow, the force used to move the sample must be greater than the static yield strength.

  • Wall Friction

    The wall friction analysis is designed to determine the kinematic angle of surface friction for a sample material against a container material. This is achieved by measuring the friction force between the container material and the sample material under different loads to generate a wall yield locus. The analysis consists of three parts: consolidation, steady state and analysis. All parts are automatic.

    In the consolidation step, the sample in the measurement cell is compressed to the preset starting load. With linear cells, this step includes twisting of the lid to help pack the material in the cell to what is called its “critical consolidation”. Critical consolidation is defined as the sample density at which it will reach a steady friction with minimal shear travel. This state in indicated by constant sample density or by a leveling off of the drop in normal load after each twist of the cell lid. For rotational cells, the consolidation step simply consists of compressing the sample until the normal load is reached.

    Sample Consolidation

    Normal Load versus Time

    In the steady state step, shear stress is applied to the sample until the measured friction force and sample volume become stable. With linear cells, the shear stress is applied by moving pushing the container material at a fixed rate relative to the upper ring. For rotational cells, the lid is rotated a fixed rate. The steady state point is the point at which the shear force becomes stable. At the steady state point, the sample has reached a repeatable, stable density relative to the applied compressive load.

    Steady State

    Shear Force versus Time

    In the analysis step, the friction force under the starting load is maintained until it is stable. The load on the sample is then reduced to a preset level and the friction force is again maintained until it is stable. This is repeated several times to produce a friction value for several applied loads.

    Friction Points

    Shear Force and Load vs Time

    The shear versus load data is then plotted to create a wall yield locus. A least squares regression is performed to calculate a linear function for the yield locus. The slope of the calculated line is the kinematic angle of surface friction.

    Friction Yield Locus

    Shear Force vs Normal Load

  • Why Volution

    If you need a shear tester, the Volution Powder Flow Tester (VFT) is the one to get. The VFT offers the following advantages over other other powder shear testers on the market:

    Low Cost: The VFT is very affordable compared to other shear testers. The reason is that we designed the instrument ourselves. We do not pay university licensing fees or royalties because we designed it using our 20 years of experience in the powder flow business. We also did not use external engineering companies which further reduces our costs. These savings are passed on to users.

    Large Pressure Range – Due to our heavy duty frame and drive system, the VFT can deliver up to 50 kg of vertical force. That’s about 6 times more than competing instruments.

    Automatic Sample Weighing: The VFT weighs the sample automatically during the measurement eliminating the need for an external balance and the time required to weight the sample.

    Normal Load Correction Due To Sample Density: The VFT automatically adjusts the normal force applied to the sample lid to correct for the force from the powder mass above the shear zone. This is very important for dense powders. Other systems do not make this adjustment resulting in shear force that are artificially high.

    True Time Testing: The analysis cells of the VFT can be removed and kept under load off of the instrument. This means time tests can be performed while other samples are being run on the instrument. Other shear testers have no capability to run time tests or you must leave the sample on the instrument for hours and hours so no other testing can be done.

    Can Test Powders and Granular Materials : Due to the geometry of the test cell, the Volution can test both powders and granular materials. Other shear testers cannot. The reason is that the dimensions of the test cells for other instruments are too small to allow large particles to be measured. It is generally recommended that a layer of a minimum of 20 particles separate shear planes from cell edges. Some cells are not deep enough. Other cells have vanes will not allow large particles to enter or will only a thin layer.

  • Applications

    Static Charge

Not sure if it’s the right instrument?

No worries, send us a sample and we will test it for you


Send a sample

Continue reading

SpreadStation

Mercury Scientific
SpreadStation

Powder Spreadability Analyser

  • Fast analysis time
  • Programmable speed – 10 to 300 mm/s
  • Temperature to 250C

Download
brochure
   Request
quote

Beckman Coulter LS 13 320 XR Laser Diffraction Particle Size Analyser 21 CFR Part 11

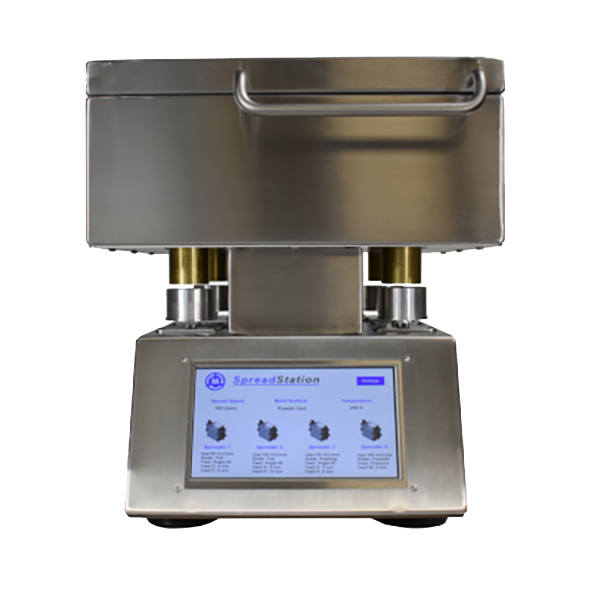
The SpreadStation Powder Spreadability Analyser measures the spreadability of powders by actually spreading powders in a layer and then analysing the properties of the layer.

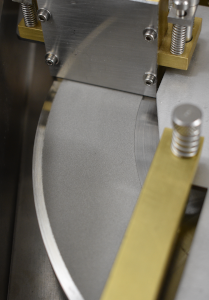
Powder is loaded into a spreading device that includes a feeder and a spreading plate. The spreading device rests on a build plate and has an adjustable gap at the bottom to control the powder layer thickness. The build plate is rotated to create linear motion between the spreading device and the build plate. This linear motion spreads the powder in a layer on the build plate.

Images of the created layer are captured and the thickness of the layer is measured using a laser distance sensor. The layer is then removed from the build plate by a scraping blade and is weighed.

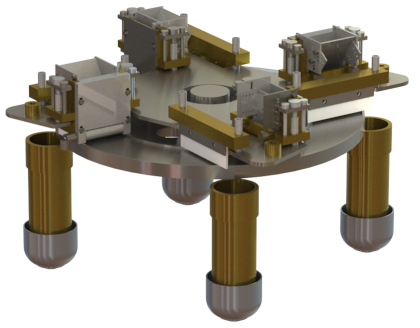
The SpreadStation can be equipped with up to four spreaders and the build plate can be a solid plate or a powder bed. Spreading speed is programmable from 1 to 300 mm/s. Spreading layer thickness can be set from 20 micrometers to 2 millimeters. The build area can be heated to 250C.

  • Spreaders

    The SpreadStation powder spreadability analyser can be equipped with up to four powder spreading assemblies. Each spreading assembly is set up with a powder feeding system and a powder spreading plate. The feeders and spreading plates can be changed quickly to study different printer parameters and simulate different printer feeding and spreading systems. The spreadering assemblies are removed from the SpreadStation for cleaning between samples. This requires approximately 30 seconds.

    Powder Feeders

    Angle Feeder

    The angle feeder allows the feeding angle of the sample powder to be adjusted as well as the gap at the bottom of the feeder.

    Straight Feeder

    The straight feeder allows the feeding width and the feeding gap from the sample powder to be adjusted.

    Pressure Feeder

    The pressure feeder allows the pressure on the top of the sample powder to be adjusted as well as the feeding width and feeding gap.

    The powder feeders deliver sample powder to the spreading zone of the spreading assembly. The feeder can be removed without tools for cleaning and quick changes. The gap that the powder must flow through to reach the spreading zone can be adjusted for all feeders. The height of the exit of the feeder can also be adjusted.

    Powder Spreaders

    Flat Spreading Plate

    The flat spreading plate has a flat bottom and can be rigid or flexible. The standard plate is made of polished stainless steel but many optional materials are available.

    Round Spreading Plate

    The round spreading plate has a round profile at the bottom.

    Rotating Roller Plate

    The rotating roller plate uses a rotating roller to spread the test powder. The rotating direction and rotation speed is controlled by software.

    The powder spreaders determine how the powder layer is formed when the powder is being spread. The spreading gap (leveling height) is set when installing the spreader on the spreading assembly.

  • Measurements

    Layers created by the SpreadStation are analysed using three independent measuring systems and produce three independent sets of data. The measuring systems are: 1) weighting system; 2) laser triangulation distance system; and imaging system.

    Weighting System for the SpreadStation Powder Spreadability Analyser

    The weighting system measures the mass of powder being spread by the SpreadStation over time. The weighting system uses load cells to measure the powder mass and 24 bit A to D converters to digitize the load cell readings.

    Weighting System Data:

    Spreading Efficiency:

    The spreading efficiency is the ratio of the spreading density to the material density. A spreading efficiency of 100% means the spread layer is equivalent to a solid layer of material while a spreading efficiency of 0% means there is no powder in the layer.

    Spreading Density:

    The density of the layer of the powder, units grams/cm3

    Spreading Rate:

    The mass of powder exiting the spreader over time, units grams/cm

    Spreading Uniformity:

    The uniformity of the layer density from the start of the test to the end of the test, units %

    Laser Triangulation System

    The laser triangulation system measures the thickness of the powder layer created by the SpreadStation.

    Laser Triangulation System Data:

    Layer thickness:

    The thickness of the powder layer measured over time, units micrometres

    Layer Thickness Uniformity:

    The uniformity of the powder layer thickness, units %

    Imaging System:

    The imaging system consists of digital cameras and LED lighting that collect images of the powder layers created by the SpreadStation. Image analysis software is then used to extract information about the layer quality.

    Imaging System Data:

    Area Coverage:

    The area coverage is the ratio of the area in the image covered by powder to the total area of the image, units %

    Channel Detection:

    The image analysis software determines if there are any channels is the powder layer and if so the width of the channel, units % channels, width millimetres

    Wave Detection:

    The image analysis software determines if there are any waves in the powder layer and their widths, units % waves, width millimetres

  • Sample Data

    Spread Speed

    Spread Efficiency

    Layer Density

    Spread Rate

    Layer Thickness

    50 mm/s 49.3% 3.95 g/cm3 206 mg/cm 158 um
    100 mm/s 38.3% 3.06 g/cm3 157 mg/cm 117 um
    150 mm/s 31.4% 2.51 g/cm3 129 mg/cm 100 um
    200 mm/s 22.8% 1.83 g/cm3 94 mg/cm 72 um

    50 mm/s

    150 mm/s

    100 mm/s

    200 mm/s
  • Applications

    Metal Powders

    Powder Metallurgy

    Spreadability Issues

  • Technical Specs

    Spreading Rate

    10-300 mm/sec

    Levelling Height

    20-2000 um

    Build Plate

    Solid or powder bed

    Sample Size

    5-25 cm3

    Temperature

    Ambient to 250C

    Travel

    Unlimited (typical 100 cm)

    Simultaneous layers

    4

    Analysis time

    2 minutes typical

Not sure if it’s the right instrument?

No worries, send us a sample and we will test it for you


Send a sample

Continue reading

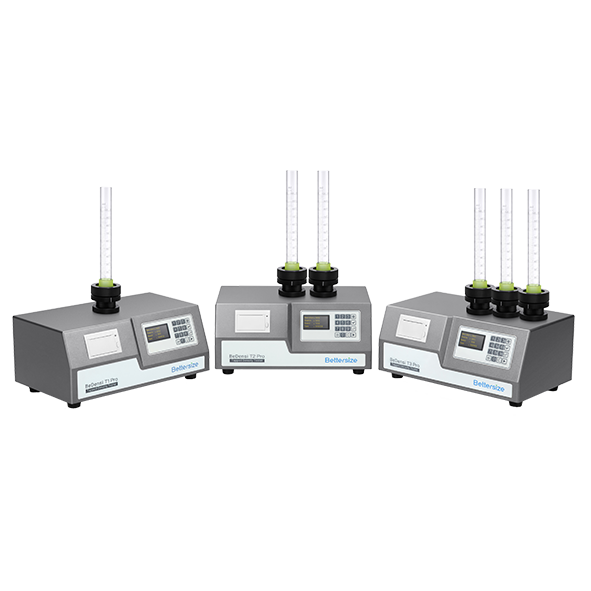
BeDensi T Pro Series

Bettersize
BeDensi T Pro Series

Tapped Density Analyser

  • Compliance (USP/EP/ISO/ASTM)
  • Easy to use
  • Up to three workstations
  • Wallet-friendly

Download
brochure
   Request
quote

Beckman Coulter LS 13 320 XR Laser Diffraction Particle Size Analyser 21 CFR Part 11

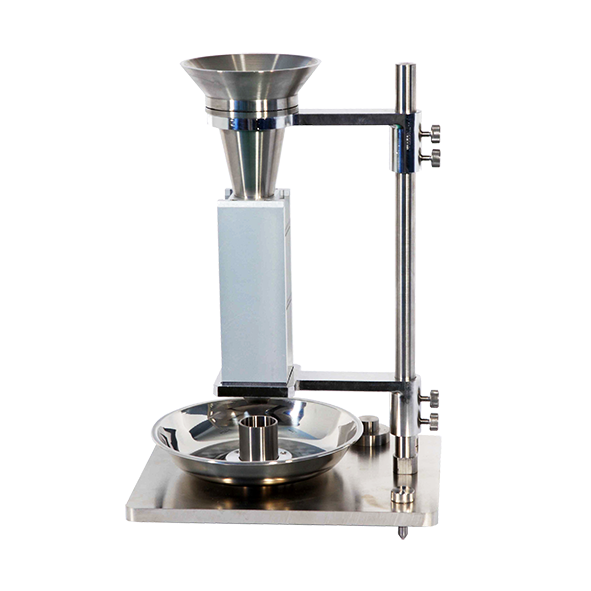
BeDensi T Pro Tapped Density Analyser

The BeDensi T Pro series is a reliable tapped density analyser that excels at intuitive operation while complying with the USP, EP, ASTM, and ISO standards. It can measure the bulk density and tapped density with less than 1% repeatability variation to help users to understand the flowability of a wide variety of powder materials.

  • Key Features

    1) Compliance

    Meeting the USP, EP, ASTM and ISO standards to provide informative results.

    2) Easy to Use

    • Set standard test conditions easily with membrane keypad
    • Replace cylinders quickly with the easy lock holders
    • One click to print detailed parameter reports on completion of a test

    3) Up to 3 workstations

    The single tapped density analyser with up to 3 workstations to meet different measurement needs and scale up your productivity even further.

    4) Wallet-friendly

    Own a reliable tapped density tester at an affordable price.

    5) Application

    • Pharmaceutical
    • Metal Powder and Compounds
    • Batteries
    • Food and Beverage
    • Carbon
    • Ceramics
    • Chemistry
  • Technology

    Introduction

    Powder characterization includes flow measurements, morphology, particle size distribution, density, and chemical composition. Bettersize PowderPro Series instruments are mainly used for the analysis of the powder physical properties by testing items such as angle of repose and fall, angle of spatula (flat plate angle), bulk and tapped density, dispersibility, voidage and cohesion, angle of difference, compressibility, uniformity, flowability Index, floodability index, sieve size, angle of slide, etc.

    What are bulk density, tapped density and compressibility, flowability index?

    Bulk density: fill the powder sample into a measuring cup, and flatten the top, the ratio of the powder mass to the volume of the cup is defined as bulk density. It indicates the mass of the powder that can be added into the vessel per volume under normal conditions.

    Tapped density: fill the powder sample into a measuring cup; vibrate the cup at a certain amplitude and frequency to remove air from the powders. After reaching the required vibration time, flatten the sample. The ratio of the powder mass to the volume of the cup is defined as tapped density. Tapped density indicates the mass of powders filled into the vessel per volume after excluding air from the powders. The data of bulk density and tapped density are often used for the design of vessels, bags, and tanks for powder storage.

    Compressibility: it is the ratio of the difference between tapped density and bulk density to tap density. It shows the degree of volume reduction from bulk to tap state.

    Flowability Index: is a set of numerical values obtained by the weighted summation of angle of repose, Compressibility, angle of spatula, uniformity, and cohesion. It is used to comprehensively evaluate the flowability of the powder. The Flowability Index is mainly used to describe powder flowability under gravity.

    What are angle of repose, angle of fall, angle of difference, and flat plate angle (angle of spatula)?

    Angle of repose: Under the static balance, the angle between the slope of a powder pile and the horizontal plane is angle of repose. It is measured when the powders fall to a surface via gravity and form a cone. It indicates the flowability of the powders. The smaller the angle of repose is, the better the flowability of the powders.

    Angle of fall: After measuring the angle of repose, apply an external force to the powder pile to collapse it. The angle between the slope of the collapsed pile and the horizontal plane is defined as angle of fall.

    Angle of difference: It means the difference between the angle of repose and the angle of collapse. The larger the angle of difference is, the better flowability of the powders.

    Flat plate angle: immerse a plane in the powder pile; pull up the plane vertically, and one angle is formed between the slope of the powders on the plane and the plane. Apply an external force to obtain another angle. The average of these two angles is flat plate angle. The smaller the flat plate angle is, the better the flowability of the powders. The flat plate angle is usually larger than the angle of repose.

    How to measure flowability of metal powders?

    According to ISO4490, the flowability of metal powders is usually measured with a Hall flow meter.

    The measurement process is:

    • Weigh 50g + 0.1g sample;
    • Plug the hole in the funnel with the finger;
    • Pour the sample into the funnel;
    • Quickly remove the finger from the small hole and start the stopwatch at the same time (precision 0.2S);
    • Wait until the powder sample runs out, and stops the timing immediately;
    • Evaluate the fluidity of the metal powder through the time of the 50g powder passing through the hole.

    The standard funnel of the Hall flowmeter needs to be calibrated by a standard sample with a flow speed of 40 + 0.5s/50g.

  • Applications

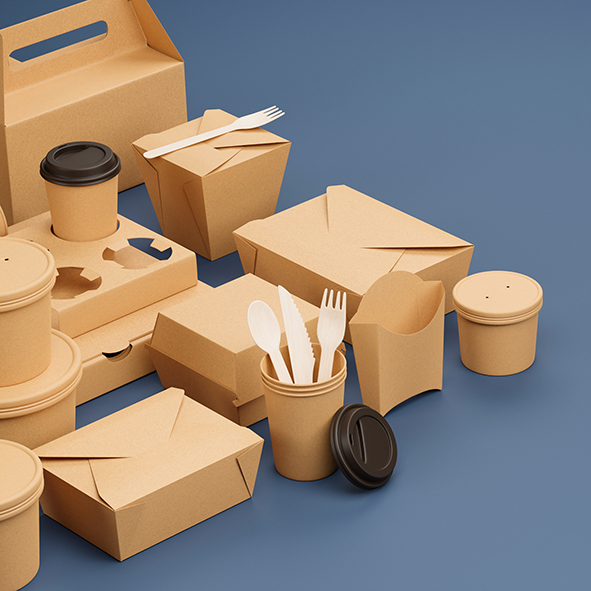
    Food Packaging

    Pharmaceutical Powders

    Lithium-ion Battery

  • Specification

    BeDensi T Pro Series
    Test Workstation Up to 3
    Compliance USP<616>
    EP 2.9.34
    ASTM D7481
    ASTM B527
    ISO 787-11
    User defined
    Taps 1 to 99999
    100 to 300 taps/min (adjustable)
    Drop Height 3 ± 0.2 mm For nominally 250 + 15 taps/min
    14 ± 2 mm For nominally 300 + 15 taps/min
    Graduated Cylinder 25 ml Readable to 0.2 ml
    100 ml Readable to 1 ml
    250 ml Readable to 2 ml
    Repeatability ≤1%
    Power 100-240VAC/50-60 Hz/ 50 W
    Dimensions Width 260 mm
    Depth 410 mm
    Height 245 mm
    Weight T1 16 kg
    T2 18.2 kg
    T3 21 kg

Not sure if it’s the right instrument?

No worries, send us a sample and we will test it for you


Send a sample

Continue reading

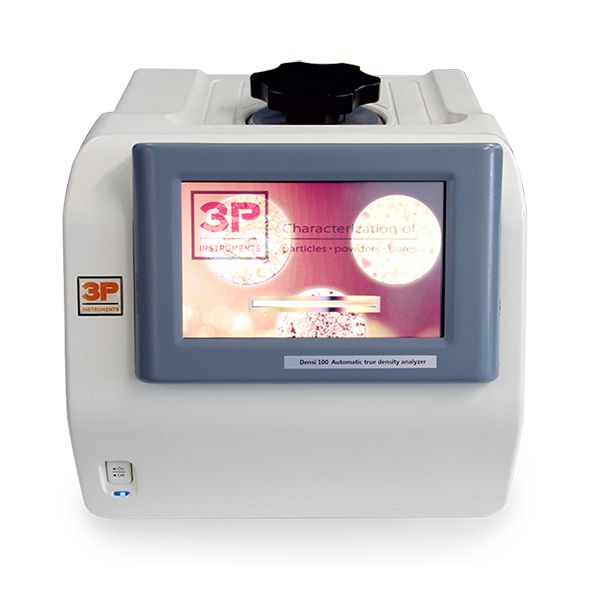
3P densi series

3P Instruments
densi series

Gas Pycnometer

  • Analyse powder density
  • 3P densi 100L ranges from 10 cm³ up to 100 cm³
  • 3P densi 100S holds sample cylinders from 1 cm³ up to 10 cm³
  • easy to handle using the 10-inch touch-scree

Download
brochure
   Request
quote

Beckman Coulter LS 13 320 XR Laser Diffraction Particle Size Analyser 21 CFR Part 11

Analyse powder density with ease – with the 3P Densi Range

The 3P densi instruments are single-station automatic gas pycnometers for volume and density measurement of porous solids and powders. The sample volume of 3P densi 100L ranges from 10 cm³ up to 100 cm³, the 3P densi 100S holds sample cylinders from 1 cm³ up to 10 cm³. The instrument is easy to handle using the 10-inch touch-screen.

  • Key Features

    • Easy to handle the instrument by the 10-inch touch-screen
    • Additional measurement option for measuring of the closed cell content for foams and other samples
    • Measurements and printout of results are totally automatic. Continuous self-diagnostics monitor and signal fault conditions that may arise. The transducer is reset to zero prior to each run. Front panel LED’s display the operational status at all times.
    • Sample temperature is displayed and printed to ±0.1 °C. This feature is important for (a) verifying operation at the calibration point or, (b) making corrections when analyzing larger quantities of materials whose density varies significantly with temperature.
    • Pycnometer volume calibration spheres can be provided with a report of calibration using measuring devices traceable to National Institute of Standards and Technology.
  • Technology

    Gas Pycnometry Method

    Closed Cell Content

  • Applications

    Porous and Powdered Solids

Not sure if it’s the right instrument?

No worries, send us a sample and we will test it for you


Send a sample

Continue reading

BeDensi B1-S

Bettersize
BeDensi B1-S

Bulk Density Tester for Metals

  • Bulk Density
  • Scott Capacity meter
  • For use with metal powders

Download
brochure
   Request
quote

Beckman Coulter LS 13 320 XR Laser Diffraction Particle Size Analyser 21 CFR Part 11

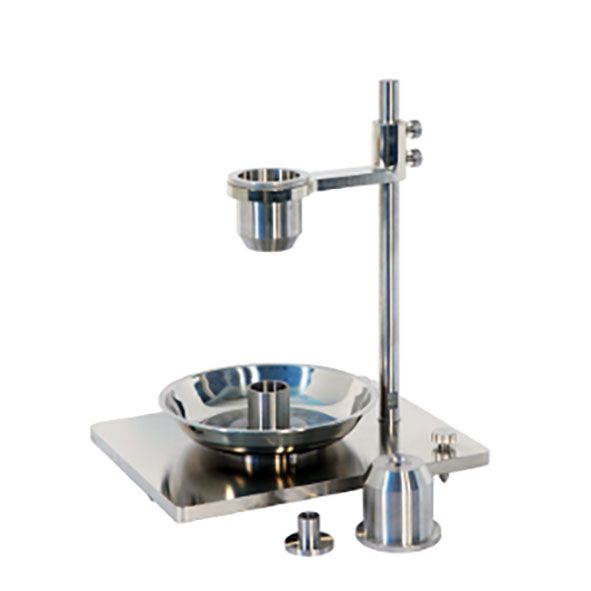
The BeDensi B1-S is a bulk density tester designed for accurate and reliable measurements of various metal powders and pharmaceutical powders. It uses Scott capacity meter technology and is compliant with industry standards such as ISO 3923-2, ASTM B329, USP <616>, and EP 2.9.34. With its compact and durable design, the BeDensi B1-S is ideal for use in laboratories and production facilities. Whether you’re working with metal or pharmaceutical powders, the BeDensi B1-S is the perfect choice for precise and reliable bulk density measurements.

  • Key Features

    1. Measurement: Bulk density using Scott capacity meter technology

    The BeDensi B1-S bulk density tester measures bulk density using advanced Scott capacity meter technology. This method provides highly accurate and reliable measurements of the bulk density of various metal powders and pharmaceutical powders.

    2. Compliance with industry standards

    The BeDensi B1-S is fully compliant with ISO 3923-2, ASTM B329, USP <616>, and EP 2.9.34 manufacturing standards. This ensures that your results are precise, reliable, and accepted within the industry, giving you peace of mind and confidence in your measurements.

  • Technology

    Introduction

    Powder characterization includes flow measurements, morphology, particle size distribution, density, and chemical composition. Bettersize PowderPro Series instruments are mainly used for the analysis of the powder physical properties by testing items such as angle of repose and fall, angle of spatula (flat plate angle), bulk and tapped density, dispersibility, voidage and cohesion, angle of difference, compressibility, uniformity, flowability Index, floodability index, sieve size, angle of slide, etc.

    What are bulk density, tapped density and compressibility, flowability index?

    Bulk density: fill the powder sample into a measuring cup, and flatten the top, the ratio of the powder mass to the volume of the cup is defined as bulk density. It indicates the mass of the powder that can be added into the vessel per volume under normal conditions.

    Tapped density: fill the powder sample into a measuring cup; vibrate the cup at a certain amplitude and frequency to remove air from the powders. After reaching the required vibration time, flatten the sample. The ratio of the powder mass to the volume of the cup is defined as tapped density. Tapped density indicates the mass of powders filled into the vessel per volume after excluding air from the powders. The data of bulk density and tapped density are often used for the design of vessels, bags, and tanks for powder storage.

    Compressibility: it is the ratio of the difference between tapped density and bulk density to tap density. It shows the degree of volume reduction from bulk to tap state.

    Flowability Index: is a set of numerical values obtained by the weighted summation of angle of repose, Compressibility, angle of spatula, uniformity, and cohesion. It is used to comprehensively evaluate the flowability of the powder. The Flowability Index is mainly used to describe powder flowability under gravity.

    What are angle of repose, angle of fall, angle of difference, and flat plate angle (angle of spatula)?

    Angle of repose: Under the static balance, the angle between the slope of a powder pile and the horizontal plane is angle of repose. It is measured when the powders fall to a surface via gravity and form a cone. It indicates the flowability of the powders. The smaller the angle of repose is, the better the flowability of the powders.

    Angle of fall: After measuring the angle of repose, apply an external force to the powder pile to collapse it. The angle between the slope of the collapsed pile and the horizontal plane is defined as angle of fall.

    Angle of difference: It means the difference between the angle of repose and the angle of collapse. The larger the angle of difference is, the better flowability of the powders.

    Flat plate angle: immerse a plane in the powder pile; pull up the plane vertically, and one angle is formed between the slope of the powders on the plane and the plane. Apply an external force to obtain another angle. The average of these two angles is flat plate angle. The smaller the flat plate angle is, the better the flowability of the powders. The flat plate angle is usually larger than the angle of repose.

    How to measure flowability of metal powders?

    According to ISO4490, the flowability of metal powders is usually measured with a Hall flow meter.

    The measurement process is:

    • Weigh 50g + 0.1g sample;
    • Plug the hole in the funnel with the finger;
    • Pour the sample into the funnel;
    • Quickly remove the finger from the small hole and start the stopwatch at the same time (precision 0.2S);
    • Wait until the powder sample runs out, and stops the timing immediately;
    • Evaluate the fluidity of the metal powder through the time of the 50g powder passing through the hole.

    The standard funnel of the Hall flowmeter needs to be calibrated by a standard sample with a flow speed of 40 + 0.5s/50g.

Not sure if it’s the right instrument?

No worries, send us a sample and we will test it for you


Send a sample

Continue reading

BeDensi B1

Bettersize
BeDensi B1

Bulk Density Analyser

  • Measurement: Bulk density
  • Testing sample: Except for metal powders
  • Technology: Natural deposition

Download
brochure
   Request
quote

Beckman Coulter LS 13 320 XR Laser Diffraction Particle Size Analyser 21 CFR Part 11

The BeDensi B1 is a bulk density analyser designed to provide accurate and reliable measurements of bulk density for samples other than metal powders. It uses the natural deposition method and is compliant with GB/T16913.3-1997-Part III: Determination of bulk density, ensuring that your results are always precise and consistent. With its easy-to-use and versatile capabilities, the BeDensi B1 is the perfect choice for anyone who needs reliable bulk density measurements for their materials and processes.

  • Key Features

    1. Natural deposition method for accurate measurements:

    The BeDensi B1 bulk density analyser uses the natural deposition method to provide highly accurate measurements of bulk density. This technology ensures that your results are always reliable and precise, no matter what type of material you are testing.

    2. Designed for testing samples other than metal powders:

    The BeDensi B1 bulk density tester is specifically designed for testing samples that are not metal powders, making it a versatile choice for a wide range of applications. Whether you are working with plastics, ceramics, or other non-metallic materials, the BeDensi B1 can provide accurate and reliable measurements of bulk density. With its easy-to-use and intuitive controls, it’s easy to get precise measurements of your materials, allowing you to make informed decisions about your processes and products.

    3. Compliant with GB/T16913.3-1997-Part III: Determination of bulk density:

    The BeDensi B1 bulk density tester is fully compliant with GB/T16913.3-1997-Part III: Determination of bulk density, ensuring that your results meet industry standards and are accepted around the world. This rigorous standard sets out precise guidelines for measuring bulk density, ensuring that your results are accurate and reliable. By using a compliant bulk density tester like the BeDensi B1, you can be confident that your measurements are consistent and comparable, allowing you to make informed decisions about your materials and processes.

  • Technology

    Introduction

    Powder characterization includes flow measurements, morphology, particle size distribution, density, and chemical composition. Bettersize PowderPro Series instruments are mainly used for the analysis of the powder physical properties by testing items such as angle of repose and fall, angle of spatula (flat plate angle), bulk and tapped density, dispersibility, voidage and cohesion, angle of difference, compressibility, uniformity, flowability Index, floodability index, sieve size, angle of slide, etc.

    What are bulk density, tapped density and compressibility, flowability index?

    Bulk density: fill the powder sample into a measuring cup, and flatten the top, the ratio of the powder mass to the volume of the cup is defined as bulk density. It indicates the mass of the powder that can be added into the vessel per volume under normal conditions.

    Tapped density: fill the powder sample into a measuring cup; vibrate the cup at a certain amplitude and frequency to remove air from the powders. After reaching the required vibration time, flatten the sample. The ratio of the powder mass to the volume of the cup is defined as tapped density. Tapped density indicates the mass of powders filled into the vessel per volume after excluding air from the powders. The data of bulk density and tapped density are often used for the design of vessels, bags, and tanks for powder storage.

    Compressibility: it is the ratio of the difference between tapped density and bulk density to tap density. It shows the degree of volume reduction from bulk to tap state.

    Flowability Index: is a set of numerical values obtained by the weighted summation of angle of repose, Compressibility, angle of spatula, uniformity, and cohesion. It is used to comprehensively evaluate the flowability of the powder. The Flowability Index is mainly used to describe powder flowability under gravity.

    What are angle of repose, angle of fall, angle of difference, and flat plate angle (angle of spatula)?

    Angle of repose: Under the static balance, the angle between the slope of a powder pile and the horizontal plane is angle of repose. It is measured when the powders fall to a surface via gravity and form a cone. It indicates the flowability of the powders. The smaller the angle of repose is, the better the flowability of the powders.

    Angle of fall: After measuring the angle of repose, apply an external force to the powder pile to collapse it. The angle between the slope of the collapsed pile and the horizontal plane is defined as angle of fall.

    Angle of difference: It means the difference between the angle of repose and the angle of collapse. The larger the angle of difference is, the better flowability of the powders.

    Flat plate angle: immerse a plane in the powder pile; pull up the plane vertically, and one angle is formed between the slope of the powders on the plane and the plane. Apply an external force to obtain another angle. The average of these two angles is flat plate angle. The smaller the flat plate angle is, the better the flowability of the powders. The flat plate angle is usually larger than the angle of repose.

    How to measure flowability of metal powders?

    According to ISO4490, the flowability of metal powders is usually measured with a Hall flow meter.

    The measurement process is:

    • Weigh 50g + 0.1g sample;
    • Plug the hole in the funnel with the finger;
    • Pour the sample into the funnel;
    • Quickly remove the finger from the small hole and start the stopwatch at the same time (precision 0.2S);
    • Wait until the powder sample runs out, and stops the timing immediately;
    • Evaluate the fluidity of the metal powder through the time of the 50g powder passing through the hole.

    The standard funnel of the Hall flowmeter needs to be calibrated by a standard sample with a flow speed of 40 + 0.5s/50g.

Not sure if it’s the right instrument?

No worries, send us a sample and we will test it for you


Send a sample

Continue reading

HFlow-1

3P Instruments
HFlow-1

Hall Flowmeter

  • Compliant with ISO 4490, ASTM B213-13
  • Determination of the flowability of metal powders

Download
brochure
   Request
quote

Beckman Coulter LS 13 320 XR Laser Diffraction Particle Size Analyser 21 CFR Part 11

HFlow 1 Hall Flowmeter

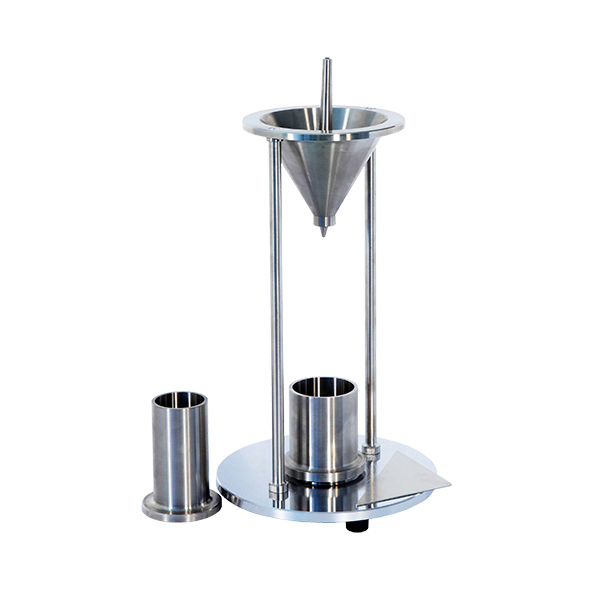
Hall flowmeter for the norm compliant determination of the flowability of metal powders

Compliant with ISO 4490, ASTM B213-13

The HFlow 1 flowmeter funnel is a reliable and accurate device to measure bulk density and flow rate in pharmaceutical and metal powders. It allows the sample to flow through a standard Hall funnel, Carney funnel, or Gustavsson funnel, providing precise and reliable measurements of powder flowability. Complied with USP, Ph. Eur., ASTM, and ISO standards, it is ideal for use in laboratories and production facilities working with pharmaceutical and metal powders.

This instrument is crucial for characterizing powder behavior, which is essential for optimizing production processes in industries such as pharmaceuticals, food, cosmetics, and chemicals. By understanding the flow properties of powders, manufacturers can improve product consistency, reduce waste, and enhance overall production efficiency.

The HFlow 1 is designed for ease of use, with a user-friendly interface that simplifies the testing process. Its automated data collection and real-time analysis capabilities enable users to obtain results quickly, streamlining the workflow in laboratory and industrial settings. This efficiency is particularly beneficial in high-throughput environments where time and accuracy are critical.

Features and Benefits

 Measurement: Bulk density and Flow rate

 Technology: Flowmeter Funnel

 Three funnels: Hall (2.5 mm orifice), Carney (5 mm orifice), and Gustavsson (2.5 mm orifice).

Not sure if it’s the right instrument?

No worries, send us a sample and we will test it for you


Send a sample

Continue reading

Have questions or need support?

1. Get in Touch

Tell us about your application and particle characterisation needs.

2. Have a conversation

We're happy to set up a call to discuss your application and answer your questions.

3. Discuss next steps

Expand your knowledge with a seminar, demonstration, sample analysis, or obtain a quote.

We are here in the UK to help and
answer any questions you might have.
Call us directly on +44 1582 704807

© 2024 Meritics.com